
Winner of the
Future Design Award
in the category Design of a Media Pedagogical Concept.
The idea of TinkerBricks is to give children an understanding of technology and programming in a playful way.
In this way, the parent-child relationship is strengthened in addition to the children's creativity.
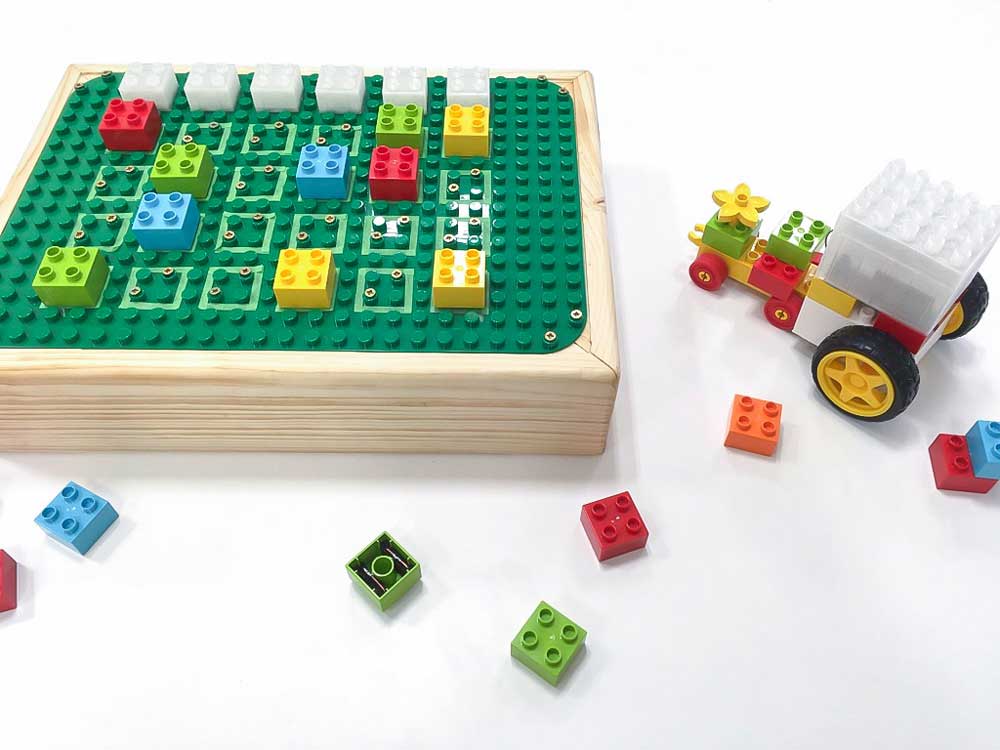
Children often only play with LEGO Duplo for a few years before the toy disappears into the attic. Digitalisation of the toy extends the play time with the colourful building blocks. In addition, children are taught their first knowledge about technology and programming in a playful way and without any pressure.
Tinker Bricks consists of two components: a remote control and a programmable figure.
Modified Duplo bricks are attached to a plate that functions as a remote control for the figure. Various actuators, such as motors, LEDs or small loudspeakers, can be built into the figure, which can be individually assembled and designed according to one's own wishes and requirements. In this way, various actions can later be performed by the figure.
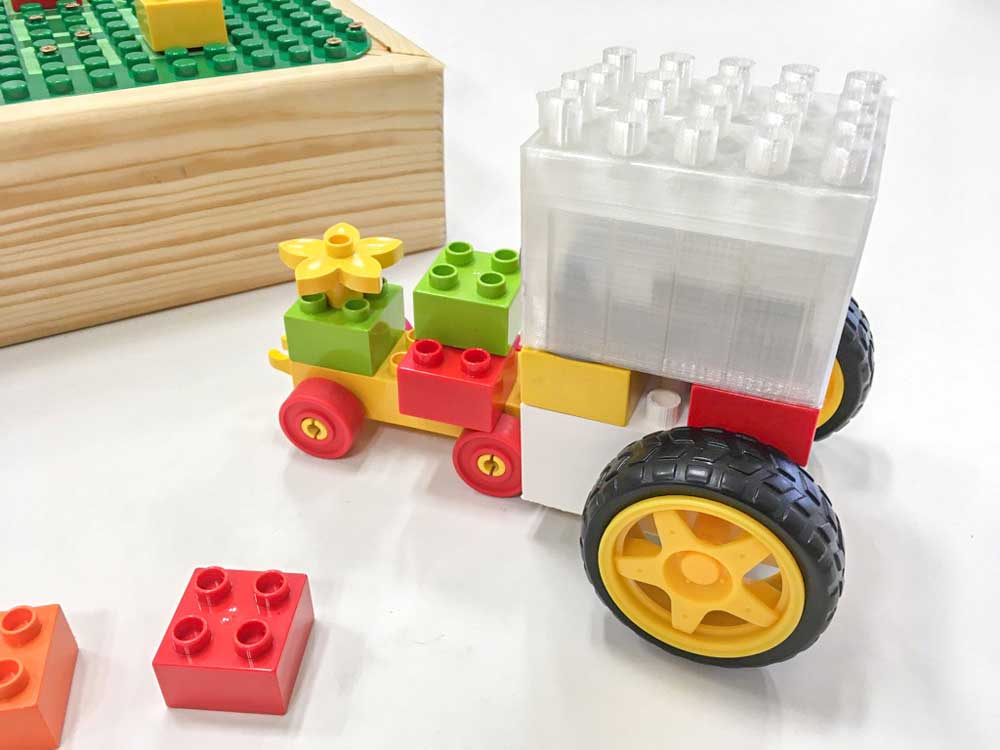
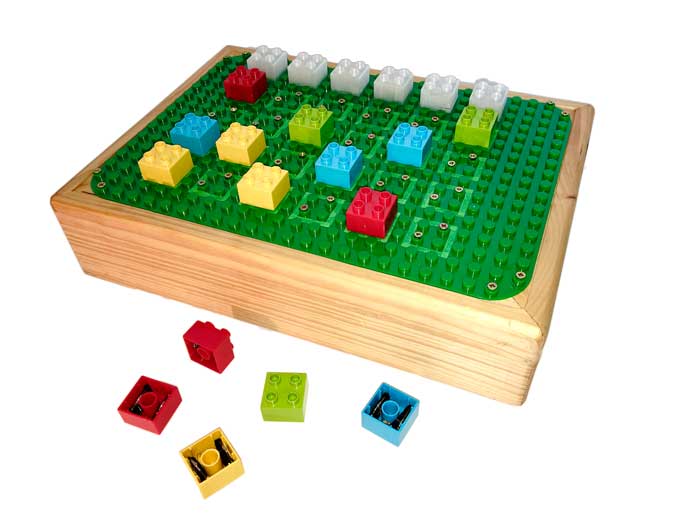
The child can use the remote control to programme which actions the figure should perform, when and in which order, by plugging the corresponding building blocks into the slots provided on the remote control.
The different action bricks are colour-coded: for example, if the motor brick in the figure is yellow, there is also a yellow brick on the remote control for a specific motor action.
By plugging in the bricks, the figure is remote-controlled. It starts to honk, blink or drive, depending on the stone that has been plugged in.
Depending on the position of the inserted stone, both the intensity and the sequence of the actions can be controlled. The active column is marked for the child by a glowing stone at the top of the remote control. One by one, the individual columns of the plate are controlled, similar to a loop function in the code. It is then checked whether, where and which stone has been placed in the active column. The recognised action is then transmitted via Bluetooth to the built figure and executed by it as long as the column is active.
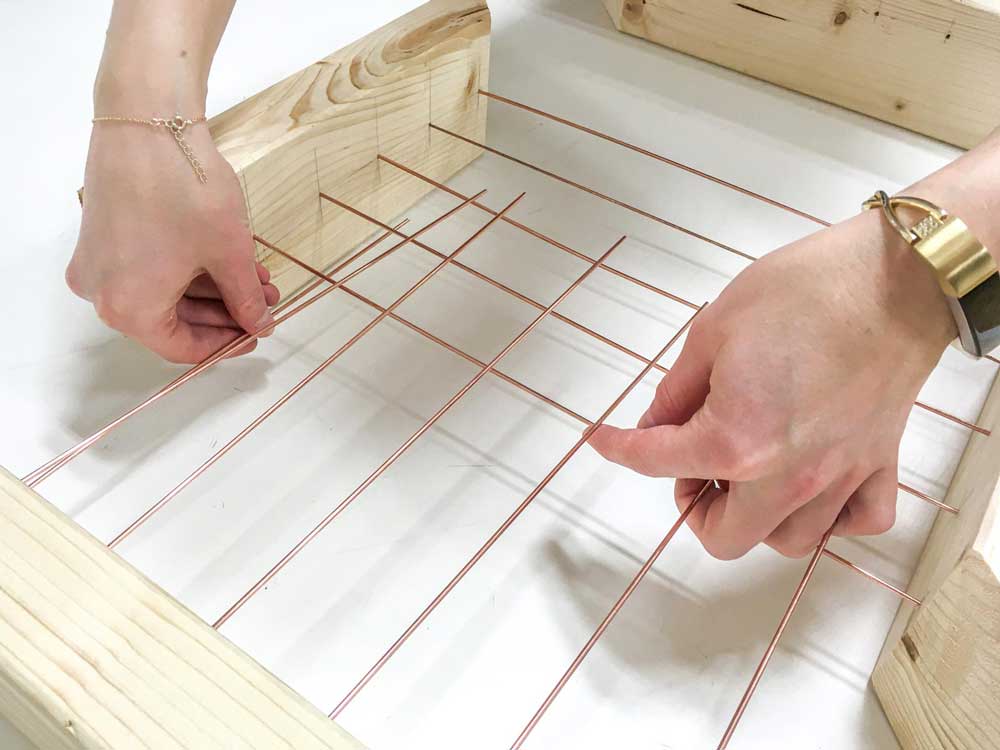
On the LEGO Duplo plate (i.e. the remote control) there are screws that can be energised by the wiring inside the wooden frame underneath.
When a brick is placed on these knobs, the resistance built into the LEGO duplo brick closes the circuit and an action can then be performed.
The knobs on the LEGO plate are divided into columns. The Arduino in the wooden frame under the plate ensures that these are controlled in short, successive time intervals and thus sequentially check the DUPLO bricks placed on them.
On the basis of resistors built into the pluggable bricks, it is possible to distinguish which of the actuators in the vehicle are to be addressed. An Arduino is also installed in the basic module of the vehicle, which communicates with the Arduino in the wooden frame via Bluetooth, whereby the data exchange takes place.
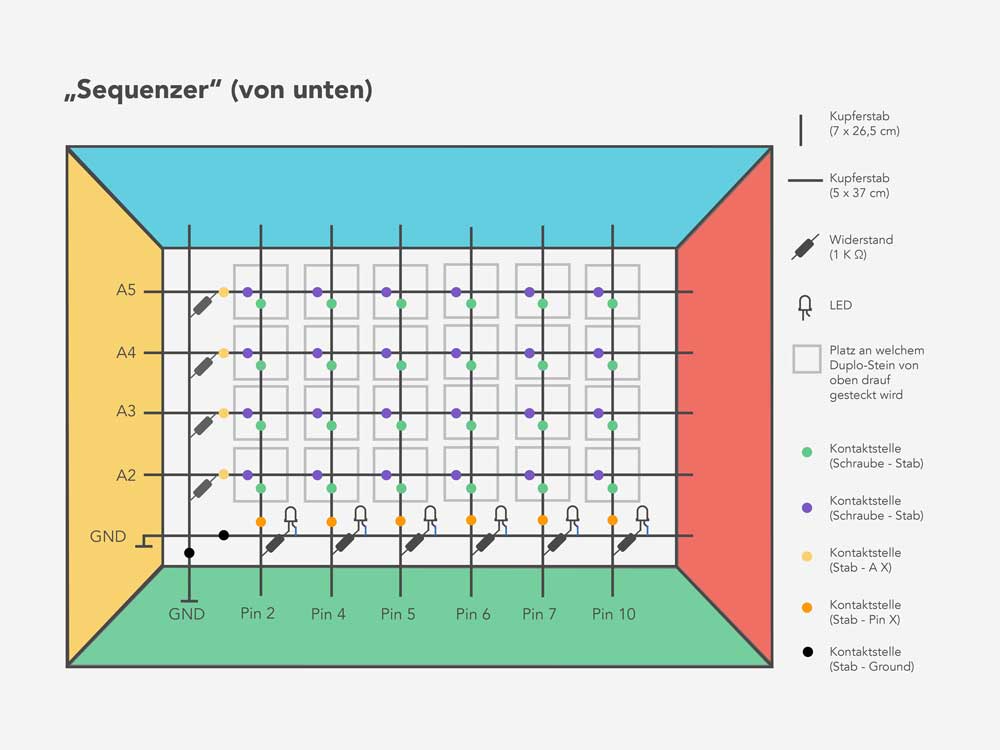
Since the project was designed as a maker project, it can be easily built at home with the help of our "DIY instructions" and also offers the possibility of adding further functions.
Download DIY instructions (German)Prototyping
Semester 3
SS 2017/2018
Conception
Ideation
UX Design
Hardware Prototyping
Construction of the Plate
Soldering
Programming (Arduino)
1st place at the
Future Design Award
in the category Design of a Media Pedagogical Concept.